Greetings, fellow dessert enthusiasts! Today, I’m excited to share a fun and creative journey into the world of confectionery delights.
In this guide, I’ll walk you through the art of making irresistible cake pops using molds.
With a dash of patience and a sprinkle of creativity, you’ll be crafting these charming treats that are as delightful to look at as they are to eat.
So, let’s dive into the sweet adventure of crafting cake pops with a mold!
How To Make Cake Pops With The Mold?
Equipment Needed:
To embark on this cake pop journey, you’ll need some essential tools:
- Cake pop molds (of your preferred shape)
- Cake mix (flavor of your choice)
- Frosting (complementary to your cake flavor)
- Lollipop sticks
- Melting chocolate or candy melts
- Sprinkles or decorations
- Styrofoam block or cake pop stand
Ingredients:
- 1 cake (baked and cooled)
- 1/2 cup frosting
- 1 cup melting chocolate or candy melts
- Decorations (sprinkles, edible glitter, etc.)

How To Make Step By Step:
1. Crumbling the Cake Begin by crumbling the baked cake into fine crumbs. This is your cake pop base, so let your creativity run wild with cake flavor choices!
2. Mixing in the Frosting Add about half a cup of frosting to the cake crumbs. Mix until the mixture reaches a dough-like consistency that holds together when rolled.
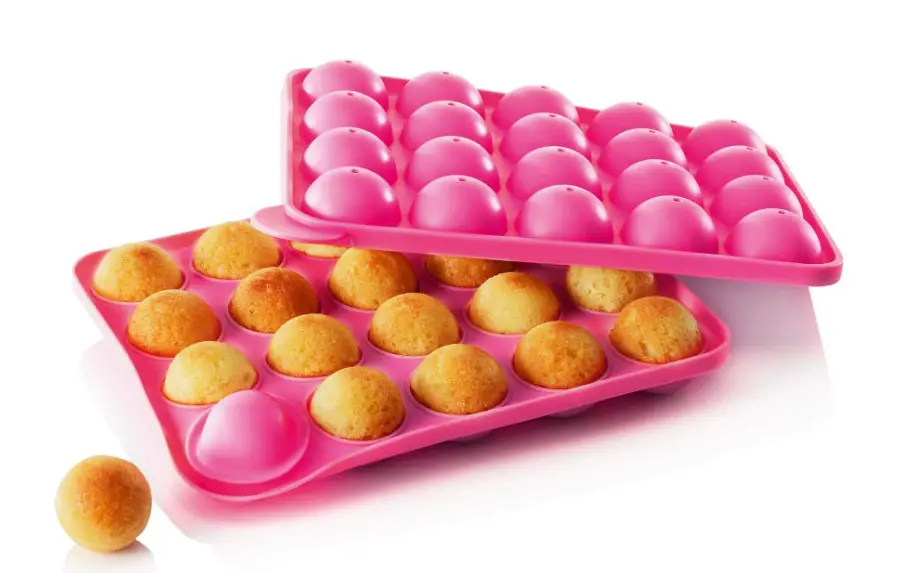
3. Filling the Molds Pack the cake and frosting mixture into the cake pop molds, ensuring each mold is evenly filled. Press down gently to compact the mixture.
4. Inserting the Sticks Place a lollipop stick into the center of each cake pop mold, gently pressing it into the mixture. This will serve as the handle for your cake pops.
5. Chilling and Unmolding Place the cake pop molds in the refrigerator for about 20-30 minutes to set. Once firm, gently remove the cake pops from the molds.
6. Dipping in Chocolate Melt the chocolate or candy melts according to the package instructions. Dip each cake pop into the melted chocolate, allowing the excess to drip off.
7. Decorating and Setting Before the chocolate coating sets, decorate your cake pops with sprinkles or other edible decorations.
Stand the decorated pops upright in a styrofoam block or cake pop stand to allow the chocolate to set completely.
How Do You Use Silicone Molds?
If you are looking for how to make cake pops with mold, you must consider the materials and tools you’ll need for this venture.
Silicone molds work when dipped into hot water for 30 seconds. Watch out when making cake balls or pops!
Permanent damage can occur if the molds are damaged, so be sure they are well-guarded until you’re ready to use them again.
How Long To Bake Cake In Silicone Mold?
Bake the cake that pops in the mold for 10-12 minutes at 170 degrees Celsius (330 degrees Fahrenheit).
If you place them on a baking sheet, it’s best to bake for about 3 minutes, flip them over and bake for another 3 minutes.
What Size Is Stick Best For Cake Pops?
Sticks are 1 inch or 2.5 cm long. They should be similar in width to a chopstick. This will help ensure the stick stays in place and does not fall out during baking.
How To Store Cake Pops?
Please place them in an air-tight bag or container and keep them in the freezer until ready to serve!
The freezer stops the cake from absorbing too much moisture, making it soggy and taste horrible.
FAQs:
Can I use homemade cake instead of cake mix?
Absolutely! Just ensure your homemade cake is baked and cooled before starting the process.
Can I use different types of decorations?
Of course! Get creative with edible flowers, crushed nuts, or even tiny fondant shapes.
Final Thought
Crafting cake pops with molds is a delightful adventure that combines baking, artistry, and culinary magic.
These bite-sized treats are not just delicious, but they also reflect your personal touch.
So gather your ingredients, let your creativity flow, and embark on a journey that will fill your kitchen with joy and your taste buds with pure delight.
Happy cake pop crafting!
